The Call for Papers for TDC 2021 Future International


The Call for Papers for TDC 2021 Future International is going to be open until October 15th. Submit your talks now. I am part of the APIs and Microservices track | Technical Committee. https://lnkd.in/etEFqM5P

Animate a enviar tu propuesta para el TDC 2021 Future International y aumenta tu networking y reputación mostrando tu experiencia. Soy parte del comité técnico del track APIs y Microservicios. https://lnkd.in/etEFqM5P#thedeveloperconference #perujug #microservices #apis

Enjoy!

Joe
Share:

Virtual Checker built with Angular + Firebase + Flutter + JakartaEE + Microprofile + PostgreSQL on Azure - Parte 2


In the last post, we start with the explanation of our authentication/authorization server that provides JWT Tokens. 

In this post, we start to build the first version of our angular application. 

Source Code: https://github.com/joedayz/web-inspector (tag v1.0)


1. Create the angular application with Angular CLI

npm install -g @angular/cli

2. Add these dependencies: Angular Material, Angular JWT, Angular Font Awesome, Angular2 Test Mask, SweetAlert2.

3. In Assets we have some fonts and images for our web admin:


4. In environments configure the principal PATHS:


Note:  localhost must be changed with the domain name or IP of your server.


5. The routing shows the initial navigation: 


app-routing.module.ts

The GuardService makes sure that a person necessarily always logs in.


6. Angular Material components are declared in a unique module.  It permits to add more easily in other modules. 


7. The main Dashboard has a drop-down menu, and toolbar and will serve to display the content in the central part.


The result is:


Note: We need to log in for access to the dashboard. It cannot be accessed directly because exists a GuardService.

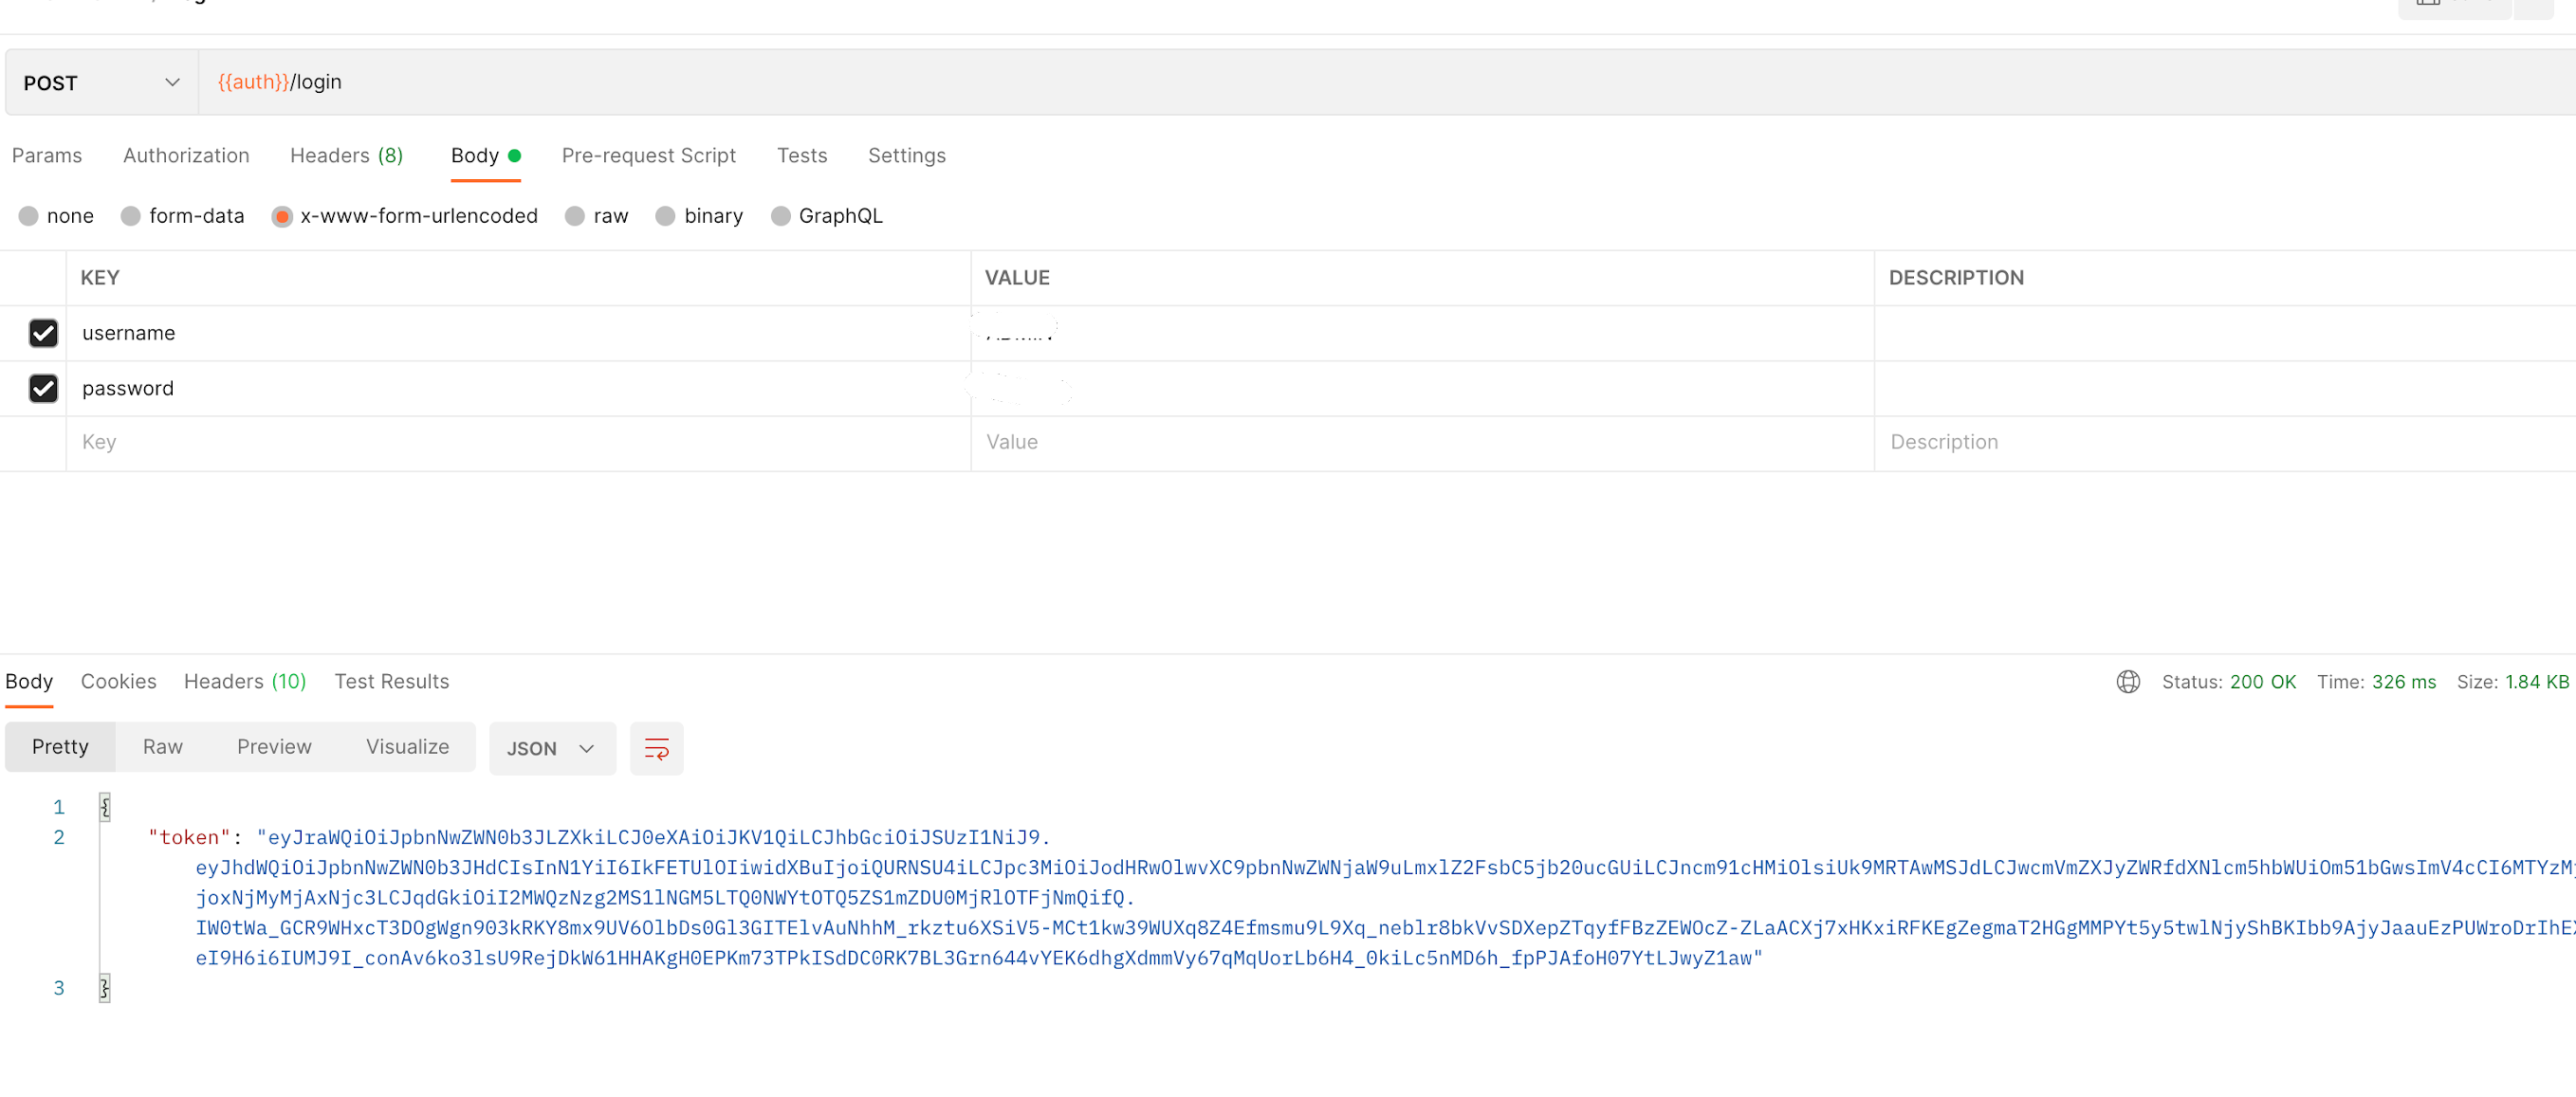
8. Finally the Login:


The LoginService has the logic that calls the authentication service to get one access token if the username and password is a valid user in our Azure PostgreSQL. 


The LoginService shows how the data is sent to the authentication service. The Token returned is saved in the session storage.

endpoint = `${environment.AUTH_ENDPOINT}/login`;    


And that's all, for now. In the next post, we show an advanced version of its web admin.

Enjoy!


Joe


Share:

Virtual Checker built with Angular + Firebase + Flutter + JakartaEE + Microprofile + PostgreSQL on Azure - Parte 1


Virtual Checker


The example that we are going to develop is about a virtual checker. The objective of this application is to allow the inspection of a car whose owner wishes to purchase vehicle insurance.
  1. The mobile application is for attending the inspection of vehicles that will be assigned to one inspector. This saves the image or video path in firebase but the real file in Azure storage.
  2. The angular application is the web admin for operators. They assign the supervision of vehicles to their inspectors.
  3. This is the API Backend that permits us to get, update, and insert the data in our PostgreSQL database. It gets additional information on firebase as image or video paths.
  4. This is our authentication/authorization server. It generates the tokens with a date of expiration. It gets the information of users and roles of the PostgreSQL database.
  5. This API Backend gets information on legacy systems to have the database of our solution updated to date. 
Architecture


This post shows the integration of different technologies and the ease that today is working with them.

  1. Our Mobile App will be in Flutter. Flutter is an open-source UI software development kit created by Google. It is used to develop cross-platform applications for Android, iOS, Linux, Mac, Windows, Google Fuchsia, and the web from a single codebase. This application will be used by an inspector, customers, operators, etc.  This app with the same codebase will be enabled to be deployed in Apple Store or Google Play.
  2. Our Web Admin will be in Angular. This web will be used by an operator or administrator.
  3. The communication in real-time between the Mobile app and Web admin will be through Firebase. We will be using Firestore. Firestore is a NoSQL document database built for automatic scaling, high performance, and ease of application development. While the Firestore interface has many of the same features as traditional databases, a NoSQL database differs from them in the way it describes relationships between data objects.
  4. Our Backend that provides all the APIS for the solution will be built with JakartaEE and Microprofile
  5. Our Authentication/Authorization Server will be another JakartaEE project using Microprofile to work with JWT Tokens and JDBC Realm in Payara Server
  6. The database SQL for the whole solution will be PostgreSQL.
  7. In this demo, we will be using Azure as a cloud provider specifically Virtual Machines, Azure PostgreSQL and Azure Storage to save images and videos.  

Prerequisites


  • You need an account in Azure.


  • We will have two (2) servers as Azure Virtual machines for installing the Payara Servers. One of them will be used to install Nginx as an additional.

1 Payara Server


1 Nginx + 1 Payara Server


Payara Servers

The API gestor will be running in this payara. 


The API Backend of our web admin and the Authentication/Authorization server will be running in another payara. 


In this same server, the Nginx will be installed and it's where our web admin based in angular will be running. 


Authentication Server

In the past, I did a post about how to create tokens with Microprofile JWT and JDBC Realm.  It has the details to generate a public and private .pem.

The source code is in this repository: https://github.com/joedayz/fps-auth-inspector

1. We need a JDBC connection Pool 


Remember to give the details of the connection to your azure PostgreSQL server:


2. Next, we need a JDBC Resource connected with your JDBC Connection Pool:


3. Finally, We need to create un Realm based on JDBC:

It option is located in Configurations:


We need to create a JDBCRealm:


To be successful in this configuration, we have to indicate the table and columns where we will find the user information.


The table is like this:


The structure of the table in PostgreSQL is below:
 create table usuario
(
    username         varchar(50) not null
        constraint usuario_pk
            primary key,
    password         varchar(50) not null,
    activo           char        not null,
    id_ct_rol        char(7)     not null
        constraint fk_usuario_coretable
            references core.core_table,
    password_encrypt varchar
);

 
4. The clients send the username and password to be validated. In the figure below the verification is done in point 1 and returns an access token in point 2. 


5. The token is generated using a private key and nimbus-jose:

        <dependency>
            <groupId>com.nimbusds</groupId>
            <artifactId>nimbus-jose-jwt</artifactId>
            <version>7.9</version>
        </dependency>


It uses the private key explained in our old post about JWT Tokens. The private key is located in src/main/resources:


This code permit gets the private key when is necessary:


6. In the web.xml we configure the use of Realms:


Note: inspector is the Realm name. 

7. The same information on security is configured in our glassfish-web.xml:


8. After of deploy in the payara server, we are going to test it in postman:


{{auth}} is the URL deployed of our authentication project:  http://server-ip:8080/fps-auth-inspector for example.


In the next post, we will be seeing the first version of our angular application, the web admin for operators.


Enjoy!

Joe


Share:

Aprendeconjoe.com


Con mucha alegría saco mi nueva plataforma de estudios denominada aprendeconjoe.com, el cual reemplazará a campus.joedayz.pe, por ahora empezaremos con venta de cursos de forma individual a USD 9.99 cada uno. Veamos como se dan las cosas en estos meses y si tiene la acogida que esperamos.

En Septiembre 2021 tenemos los siguientes cursos pagados:

Los siguientes cursos gratuitos:

Cualquier consulta no dude en contactarme por WhatsApp al +51 939965148.

Enjoy!

Joe

Share:

Backend of Comparabien.com.pe with JakartaEE, DeltaSpike and Blaze Persistence


Prerequisites


In this article we are going to remember 2 previous articles that are:


Source Code


The backend source code is in this link https://github.com/joedayz/ConcentradorJakartaEE.
The frontend source code is in this link https://github.com/joedayz/concentrador.

The intention is to show the great work of my colleague Jorge Pingo.

Jakarta EE and MicroProfile


In this article we will not use Spring Boot, we will use JakartaEE and Microprofile to be able to use the APIs that allow us to create Rest services with JAX-RS and persistence with JPA and CDI.


Apis from Jakarta EE:


Apis from Microprofile:


Persistence.xml

In this file, we configure the JDBC resource that we will have in Payara Server.


In Payara Server the JDBC Connection Pool will be defined:


And JDBC Resources:


Blaze Persistence

For the Backend, we are going to use this API that allows you to write JPA Criteria queries that use advanced SQL features. The source code for the project is on GitHub and there you can find various use cases.


DeltaSpike


Another project to use in this project is DeltaSpike which consists of a number of portable CDI extensions that provide useful features for Java application developers.
It requires a CDI implementation that is available in runtime.
These features are in addition to those provided by the CDI specification. In this link you can find the complete list:


In the file apache-deltaspike.properties we will configure:

globalAlternatives.org.apache.deltaspike.jpa.spi.transaction.TransactionStrategy = org.apache.deltaspike.jpa.impl.transaction.BeanManagedUserTransactionStrategy


NOTE:

By default the transaction type used by @Transactional is RESOURCE_LOCAL. If you set the type of transaction-type = "JTA" in the persistence.xml, you have to enable another TransactionStrategy in the beans.xml which is called org.apache.deltaspike.jpa.impl.transaction.BeanManagedUserTransactionStrategy.


Context Root


The context root is defined in the glassfish-web.xml file like this:


Modelo

In the model package, you will find the JPA entities and the entities related to views.


Repository

Thanks to DeltaSpike we can have a Repository that will implement for us the methods to persist our entity and we can also create our own Object Query.


This is very similar to Spring Data.

Service

The business layer will be able to use the repository layer only using @Inject.


In this layer, we will find the ConsultaProductoServiceImpl.java class that the Criteria API will use to build the query according to the filters we have in the application. In addition to that, the implementation of paging.

To achieve this DeltaSpike is used:

import com.blazebit.persistence.deltaspike.data.Page;
import com.blazebit.persistence.deltaspike.data.PageRequest;
import com.blazebit.persistence.deltaspike.data.Pageable;
import com.blazebit.persistence.deltaspike.data.Sort;
import com.blazebit.persistence.deltaspike.data.Specification;

Controller

Finally, in this layer, we will have the REST endpoints. We start by configuring the class that inherits from the Application.


And then you can create your controller classes to handle the endpoints you need:


As you can see, you can define the scope, the main path and the exchange format (JSON) between server and clients:

@RequestScoped
@Path("/entidad-financiera")
@Produces("application/json")
@Consumes("application/json")
public class EntidadFinancieraController 

Running the Backend

To test the application, first, make sure to start your payara server.


Then configure the payara server in your IDE to be able to deploy the application there:


When you run the application you will see the following result:


And you can try this endpoint (http://localhost:8080/api/v1/concentrador/opcion) to see the available options:


Configuring the Backend in the FrontEnd

In order to use the backend, we put the base endpoint in the environment.


BASE_ENDPOINT: 'http://localhost:8080/api/v1/concentrador'

When executing the application we will obtain the following result:


And as you can see, you can see the available options that the backend returns to us.

We hope you enjoy it.

Enjoy!

Joe


Share: